What to Know About C-section Recovery:
You’ve made it through your pregnancy and delivery and have now reached your 6-week check up. Hopefully things are healing well from a surgical standpoint and your doctor has cleared you for activity. However, the details on the “what” or “how” are very vague, and often stated as “ease into things” or “do what feels good.” Or maybe you find yourself further into your recovery and are still struggling with what’s often known as a c-section pouch or pooch, and you wonder why it isn’t going away. Recovering from each pregnancy and delivery can be a different journey for each individual and can even vary per pregnancy, so it’s hard to offer a set time of how long it can take to recover from your c-section.
Oftentimes it is not acknowledged how challenging a c-section recovery can be during these initial stages, or that it is a major surgery and you need to take things slowly as you allow your body to heal. Check out this article for early postpartum suggestions and a general overview of c-section recovery.
We each have our own story and history that we bring into our recoveries, and each c-section has potential variability. Moving forward in this article, we’ll look at an overview to assess and address what to do beyond those initial 6 weeks (or if you’re still struggling with your recovery months or even years later).
C-Section Incision
First, let’s focus on the elephant in the room: the c-section incision itself. Yes, we all know it exists -- but it often gets ignored because of negative associations, a mentality of ”it is what it is,” or not realizing the importance of addressing it. Even years after delivery, if you’re still struggling with finding your lower abs, have low back or hip pain, leaking, pelvic floor weakness, or a lower belly pooch, taking a look at what’s going on with your incision could be key to unlocking your potential for healing and better function.
The surgeon's main goal is to get the baby out and sew you back up, making sure everything is held together; but what happens to your tissue and function afterwards is your job. Looking at the incision from the outside, one might think that all c-sections are created equal. However, that’s not the case. The incision types performed are based on the doctor’s training background as well as how much subcutaneous fat you have. Your tendency to develop scar tissue (we will all have it, some will just have more than others); elasticity of skin, which is genetic; and past medical history all can play a role in an individual's recovery. You may also have complications that occur either during delivery or afterwards, particularly in that first 6 week window, which can cause extra bleeding and scar tissue.
Any type of negative emotion you might have had toward the c-section or the incision itself can affect how you interact with it. It’s important to remember that all birth experiences are different, and no matter how it happened, you still delivered a baby! Emotions can definitely play a role in our healing, and sometimes emotions we store from pregnancies and deliveries need to be addressed further with outside help for our physical healing.
Overall, take this as a friendly reminder to objectively look for what needs to be addressed both physically and emotionally when it comes to assessing what you went through and setting realistic expectations. Comparing yourself to others and holding yourself to the standard of how quickly society says you should have “bounced back” can often lead to frustration and disappointment, rather than being realistic with what needs to happen for you to heal from such a major surgery at this point in time.
C-section Scar Massage
Now that you have acknowledged the c-section incision, let’s look at what to do about it. During those first 6 weeks postpartum, it’s important to remember you just had a major surgery. You need to allow time not only for the external but also the often forgotten internal incisions to heal by minimizing the stress you’re putting on that tissue. This will include following lifting and activity restrictions provided by your doctor and wearing a belly binder in the early stages as needed to support your healing tissue. I know it’s hard, especially while caring for at least one other (tiny!) human -- but this initial stage is so important to your overall healing.
Once you are cleared by your doctor for release work, it’s time to start gently working on the individual layers of your incision to be able to move freely from each other. In order to get to the uterus, the doctor had to go through various layers of tissue that you can think of as plastic wrap. As inflammation has occurred and then resolved, scar tissue has formed between these layers. It’s as if you’ve taken a hair dryer to the plastic wrap and shrunk it all together. This prevents the layers from moving and gliding independently from each other and even tacks down specific areas, which limits how your muscles can function. Think of it as built-in internal resistance for your abs that are already weak and working hard to function due to being elongated from pregnancy. Nobody likes extra resistance!
You’ll need to start superficially and work your way down over time to the deeper layers, progressively narrowing your focus and intensity to areas that might be a little stickier and need more work. It can be common to not feel sensation at your incision site, or for this to be uncomfortable at first. Ease your way into it, even if you start simply by placing your hands on the scar to acknowledge it and whatever feelings are associated with it, and then progress as you feel comfortable. It will all improve as you keep at it, going at your own pace.
Then, as long as you are cleared by your doctor, looking into some abdominal or visceral massage (either by a professional or being educated by one to do yourself at home) can often be particularly helpful if you feel like you have bloated abs. Just like we talked about the superficial layers being able to move, having an incision that goes all of the way inside your abdominal cavity means more parts need to get unstuck so they can move freely from one another. Organ resting position as well as being able to glide and move around underneath your muscles and fascia can affect how well you can engage your abs and what your abdominal tone is like at rest. Your organs get pushed around during pregnancy to accommodate for the growing baby, and they don’t necessarily magically fall back into place after the baby comes out. Some abdominal massage can give a little assistance to improve their resting position and help set up your abs and organs for success.
One last thing that can help with your incision is looking into silicone tape for c-sections. This tape is designed to help provide almost a gentle lift and massage to your c-section scar while you’re moving in daily life. It can be found on Amazon and in local pharmacies.
No matter how far out you are from your c-section, it’s never too late to work on your incision and give it some consistent love and attention to help with your lower ab strengthening. Mobility work can take consistent effort every day or every other day, making sure to not go so aggressively that you cause soreness in your incision that lasts into the next day. It’s not about getting it all in one go, but working through those layers a little bit at a time. In the end, your scar should be able to lift and feel almost the same as the tissue around the scar. Don’t be afraid to seek out advice from a pelvic floor physical therapist for assistance with this, or try abdominal massage (some massage therapists and orthopedic physical therapists do abdominal or visceral massage work as well), whether it’s for one session for education on self-massage, or intermittent appointments of professional touch and massage work to boost your self-care routine.
Breathing
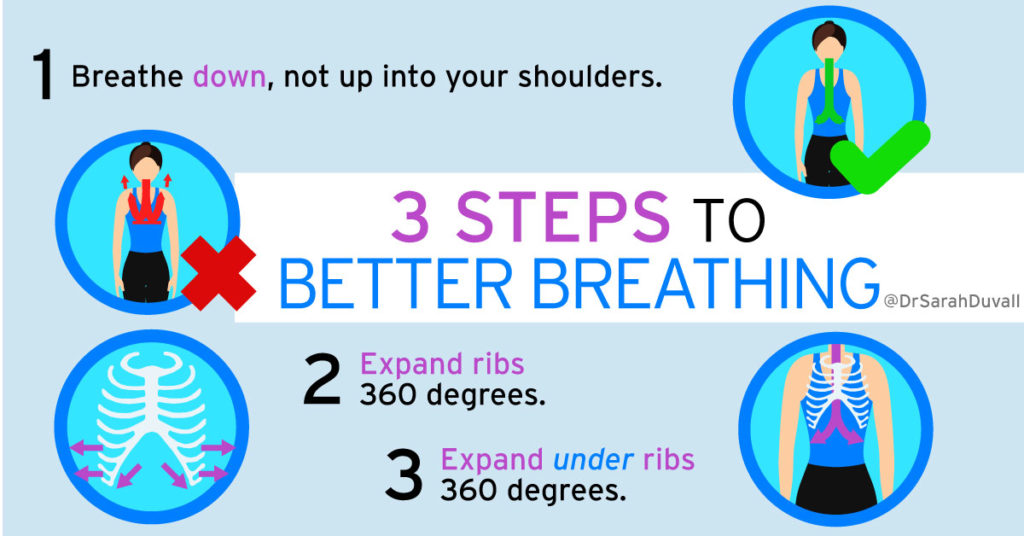
Now that you’ve addressed your incision, let’s get to moving. First, just like any postpartum journey, it’s important to look at breathing as one of your pillars to recovery. Proper breathing helps set up a great foundation for rib and diaphragm movement which affects how our abs and pelvic floor function.
You can think of your diaphragm and rib cage as an umbrella with a 360 degree breathing pattern of movement.
Oftentimes that pattern can be more like a broken umbrella, particularly after pregnancy. You might need to bias breathing drills to help close off parts of your ribs or abdominal canister that move too much and open up areas that don’t move enough.
This 360 degree breathing concept is important for how you contain pressure. If you don’t have coordination or balance between your diaphragm and pelvic floor movement on either the inhale or exhale, then you’re going to put pressure out in one area or another instead of having a full containment of pressure and proper brace to your system.
Having a great foundation for this pressure management system allows you to build up intensity in core work and create a great brace for the rest of your body to work from. This will help prevent injuries and optimize your healing.
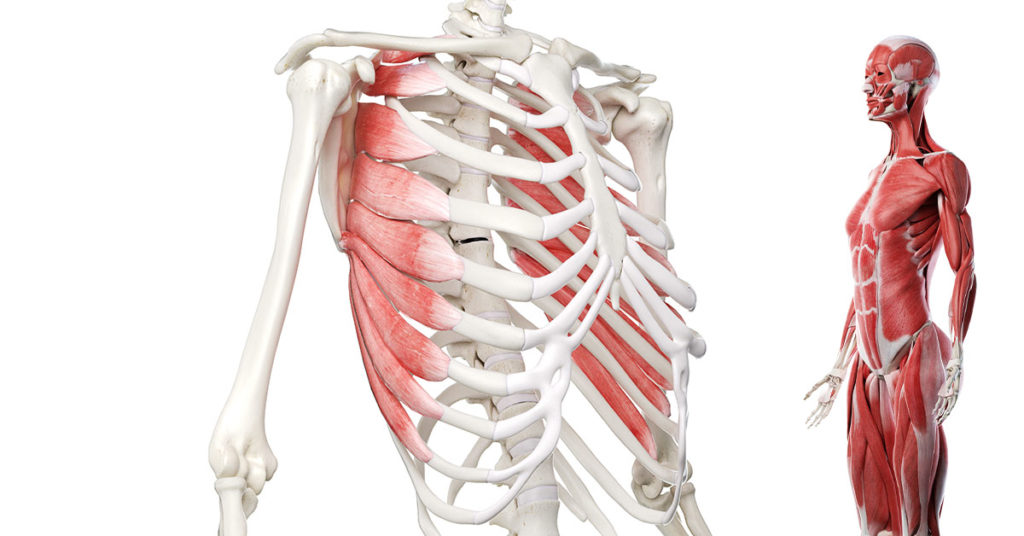
Gentle breathing drills can be performed early on in your recovery, but make sure they aren’t causing any lasting pain or discomfort at your c-section incision site. Focusing first on slow, full inhales, and then slow, full exhales with a “ha” style of exhale (as if you’re fogging up a mirror) will help your little muscles between your ribs (your intercostal muscles) learn to work again. This will promote good rib movement without overusing your abs. This is important not only to avoid putting too much stress on your abs early on as your c-section incision is healing, but also to help make sure you’re not putting too much pressure down onto your pelvic floor.
Our rib cage can get stuck in a position of being either too opened or too compressed, which will affect where our inhale goes and what our exhale and eventual brace looks like. A rib cage that can’t expand in a balanced way will often put too much lengthening and pressure out through your abs. If you don’t get enough expansion, you’ll breathe up into your neck and shoulders, creating no movement at your ribs and diaphragm. This can affect your ab and pelvic floor function as well as contribute to neck and shoulder pain.. A rib cage that can’t compress in a balanced way will often contribute to poor containment of pressure, with too much pressure going down into your lower abs and pelvic floor or straining in your chest and neck when trying to do ab work. Check out this video for how to feel what’s going on in your rib cage.
With any breathing drill, you can think of it as putting yourself into a position where you’re compressing the area that moves too well, and lengthening the areas that don’t move well enough. Then you can use the inhale to stretch the restricted areas further from the inside out, and the exhale to compress the areas that are too mobile, taking up the slack and further stretching the opposing restricted areas. This causes a repositioning of your ribs so when you come back to neutral, you should feel more of the 360 degree movements in your rib cage. You’ll start with more passive positional drills that help decrease the resistance in active drills.
One of my favorite drills for working on promoting balance in rib cage expansion and finding your intercostals (which help your ribs come down) is child’s pose breathing with an overhead reach.
You’re looking here for an equal contribution to the elongation of tissue all along the back side of your body and you’re working to free up your shoulder blades from your rib cage to help all aspects of your rib cage expand. This also helps teach the “ha” exhale with gravity and support to gently push your ribs back while you still maintain great length through your rib cage instead of letting your upper abs take over.
Mid back rotations can also be a really great way to loosen up parts of your ribs and thoracic spine that become restricted during pregnancy. Just make sure that when you’re going into the rotation you’re not faking the movement by flaring your ribs or arching your lower back. This will actually just further expand and open the area in the front that’s already good at moving.
Sometimes placing a pillow under your head can help. Think of the rotation as your bottom side ribs coming around toward your top side hip bone for your rotation, rather than arching your back to get there. Then use your inhale to expand into your sides, back, and the back side of your pelvic floor, not just into your belly. As your lungs fill up with air, feel your chest wall expand. On the exhale, you can visualize as if it were a balloon deflating, taking up the slack and wringing yourself out like a wash rag to rotate a bit more.
Now that you’ve made sure your rib cage from top to bottom can expand well, you can bring your attention back to your abs. Tightness can occur in your lower abs due to your incision or by subconsciously sucking in your abs to try to make them flat. You can address this by placing a hand just inside your hip bones and try to breathe into the bowl of your pelvis, feeling for that area to expand. This will help decrease resting tension which can affect how well you can engage your abs. A muscle that is constantly engaged has a hard time lengthening and then a hard time further contracting. This can also be helpful if you get no breath expanding down, but just make sure your ribs expand as well and you don’t just belly breathe.
Remember with the beginning stages to promote a relaxed exhale instead of a forceful one as you work on rewiring and balancing out the system. It should just be your intercostals working and a natural lift and rebound of your pelvic floor and diaphragm that was set up from a balanced inhale. Try to make sure you’re getting a full inhale as well as a full and complete exhale, oftentimes making the exhale twice as long to encourage this, and pausing at the end of each. It’s about getting the pattern down so that when you apply load and increased force which will tie into ab strengthening, you’ll have a good foundation to build on.
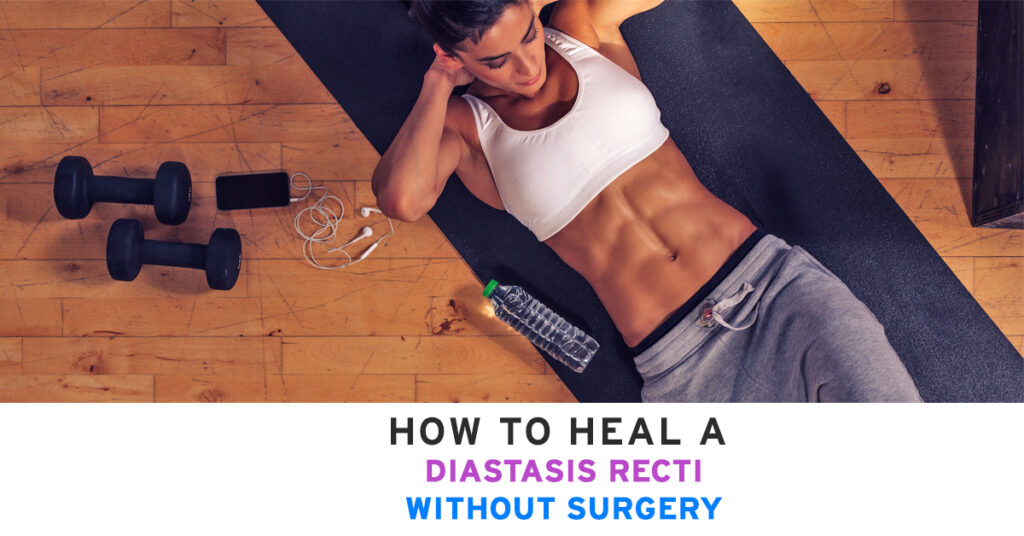
Core Strengthening Exercises
Now that you’ve touched on your breathing system, we’ll tie it in to some ab work. No, you don’t have to be perfect with your breathing before progressing into ab work, because improving ab strength can help with your breathing. However, by learning how to do ab work while still working a great 360 degree breathing pattern, you’ll strengthen your abs in a more balanced and dynamic way and master the concept of “breathing under a brace.”
Here’s a great example of what that looks like
When looking at how you engage your core, it’s important to assess if everyone is coming to the party.
Just as you looked at your breathing, sometimes this might mean biasing one part of your abs in your workout more than another. This can be a certain muscle group or level of abs.

This will help make sure the parts that are already strong aren’t the only ones getting stronger, and help boost the parts of your abs that might be a little bit sleepier, such as your lower abs and transverse abdominals, to create a great brace and containment of pressure.
Your lower abs and transverse abdominals as a whole are often weaker after pregnancy due to the pelvis position and postural changes that occur, putting the tissues in a lengthened position. Your lower abs, including your lower transverse abdominals, internal obliques, and the bottom part of your rectus abdominus assist with pelvic stability, and transverse abdominals as a whole provide spinal stability. Imbalances in your transverse abdominals compared to your rectus can be common even before pregnancy and give the appearance of a bread loaf type of abdominal contraction.
Lower abs need to be addressed even more after a c-section due to the inhibition that occurs from the surgery. Being able to engage your lower abs and transverse abdominals just as well as your other muscles is particularly important for flattening of your abs, protecting your pelvic floor, and helping with any back or hip pain you may have.
Best Lower Ab Workouts
With any exercise, it’s not just about what you do but how you do it. Sometimes simply changing the intention of an exercise can change our results. Bringing a bit more intention and awareness to what’s happening in your lower abs and rewiring how you brace can make any exercise more beneficial to help strengthen your weakest link rather than letting the “bullies” keep running the show.
The first step of being able to connect to your lower abs is bringing an increased awareness to the area. Sometimes this bit of increased awareness lets you isolate just your lower abs and “sneak attack” past the middle and upper abs that want to join the party too quickly. Upper and middle abs running the show can create too much pressure down on your lower abs and pelvic floor. Check out the lower ab challenge, and see how you do.
In the beginning this can feel like Jedi mind tricks, so explore the movement, trying different positions, intentions, visualizations and feedback to help you connect to this area. Here are some tips and tricks.
Think of building a fire. In the beginning you have to start with sparks and maybe some not-so-great attempts, but as you keep at it and build up from the initial sparks, the intensity of the fire will grow. You can then tap into that increased awareness and bias of engagement in your other core exercises.
When it comes to exercise, people are often cued to tuck their pelvis to find the lower abs for their initial brace, but if you are doming or pooching when you tuck, this movement could be further contributing to a lower belly pooch.
Instead, change the intention to feel a bit of “hollowing out” or “sinking” of your abs, and bring length to your core canister to help you avoid crunching down, which would cause your superficial abs (rectus and obliques) to run the show. With the hollowing out feeling, you’re making sure it’s not sucking in or pulling in only at your belly button, but the entire system is working as a unit. Visualize how after a well set up inhale, the exhale is a bottom-up engagement where your pelvic floor gently lifts, connecting to your lower abs gathering and sinking. Then as you continue your exhale, the rest of your abs and ribs pull in toward each other and flatten down toward your spine as one unit. This will help to fully contain the pressure in your system and create a balanced brace.
When it comes to this engagement while laying on your back, it can help to place a small towel roll either at your lower ribs in the back or at your lumbar spine to cue a space for you to expand into (and then compress your back into on your exhale) while still keeping length in your core.
Finding your transverse abdominals in your brace then needs to be taken to the next level as you add movement elsewhere. These brace tips can be applied to how you perform dead bugs or leg lifts (commonly performed lower ab exercises) to get the most out of them.
You should be particularly suspicious if dead bugs feel easy or if you feel a clicking or popping in your hip or lower back while performing them. Check out this video for some extra tips
If you’re going to do an exercise, you might as well get the most bang for your buck and make it worth your effort!
You can apply this same idea by letting your legs fall out to the sides one leg at a time instead of moving them up and down, without allowing any pelvis movement. This helps work on pelvis stability in a different plane of motion, which is important because our hips move in more ways than just forward and back.
Another commonly performed lower ab exercise is the bird dog. This can be great for rotational stability for your pelvis and lumbar spine to help with hip and low back pain. That being said, it’s again important to be suspicious if it feels easy or like nothing is really working. You can think of it as a dead bug on hands and knees, where someone shouldn’t know that you were even moving an arm or a leg if they were just looking at your core because you have such great core control and engagement.
Your transverse abdominals are anticipatory muscles, so as you work on strengthening it’s important to move slowly to give them a chance to rewire and increase their speed of firing. This can be particularly important if you have a history of low back pain where your transverse abdominals and multifidi (these are little, back-stabilizing muscles) have atrophied and are a little slow in their response time. By going slowly, you can think of it as giving them a “heads up” that stuff is about to happen and they had better show up to control it. As you move slowly, you can feel when your pelvis wants to rock, rotate, or shift, and you can work on keeping that from happening. Work on going just to the edge that you can control and then coming back to the start position, and try to sneak a little bit further with each rep. This might not be very much movement at first, but as you do more reps and build those connections and strength, you can slowly inch further and further into your movement.
When performing a small crunch, which is another common ab exercise for healing a diastasis, you’ll want to look at what is happening in your lower abs.
Are you able to perform the crunch and flatten your entire abs down as a unit? Making sure you set up with a great inhale followed by a bottom-up exhale and squeezing something between your knees can help with this. If you have quite a bit of rib flare, you also might have to start with your head and shoulders on a pillow at first so your abs don’t have to work as hard to pull your ribs down. Doing a crunch this way will help strengthen your abs as a unit, helping to train your lower abs to successfully handle pressure created from above without overpowering their ability to contract.
Changing your intentions in an oblique exercise can help you find your lower abs, including your internal obliques as well as your transverse abdominals. Your external obliques and internal obliques work on opposite sides to rotate you (left external obliques and right internal obliques turn you to the right). Doing something like a half kneeling press with rotation (where you’re thinking of pulling yourself over with your internal obliques versus pushing with your external obliques) can be a great way to help bias an exercise to focus more on your lower abs while still involving other ab muscles.
One last exercise that can be great for diversity of movement as well as bringing some hip function into play are side-lying knee lifts. Think of this as a sideways dead bug where you also get adductor and glute work for ultimate pelvis and back happiness.
What about Waist Trainers?
Celebrity waist trainers do not help strengthen your core, and could actually do more harm than good. Here’s an entire article written about it if you’d like to read more details.
Bringing in the Full Picture
If you’re having a hard time progressing or doing lower ab exercises, sometimes we need to look at the kinetic chain for how you’re setting up your lower abs to function. This can be particularly indicated if you struggle with side lying knee lifts. If you have a rotation or shift in your pelvis, this can put your lower abs in a lengthened and twisted position, making it hard for them to work. You can start to address this shift by exploring one-sided hip or pelvic floor tightness, which is particularly common if you have a history of SI joint or hip pain.
Our adductors fascially connect to our lower abs and imbalances can contribute to SI joint, pubic symphysis, and hip pain, so it’s important to take a look at them in isolation.
Our glutes and hamstrings can affect how the pelvis is positioned at rest as well as where the movement comes from when you’re moving. If you tend to fall into more of an anterior pelvic tilt (tipped forward pelvis), this puts your lower abs in a constantly lengthened position so they have to work extra hard to engage. By working on finding hamstrings, you can use this as a pelvis repositioning drill to set up your lower abs for more success in subsequent ab work. To take this further, you can assess whether one side is better at engaging than another to help address a shift or twist happening in your pelvis.
You can also use your hamstrings in a core exercise like a plank or side plank to help improve how your rib cage is stacked over your pelvis to promote optimal breathing and bracing.
It can be fun to try either isolated hamstring engagement or working on back side hip tightness and then go back to your lower ab work immediately afterward to find that they “magically” work better, because they were set up for success. Sometimes this shift takes a little bit longer, but if you find an imbalance in your hips, focus on making improvements there to help your ab work feel like less of a struggle.
As a whole, strong glutes and hamstrings that function well together can help support your abs so they can do their job. Here are a few ideas on what that might look like:
Learning how to hip hinge to eccentrically lengthen glutes while maintaining lower ab engagement so that even a hip hinge or squat becomes a lower ab workout.
Pelvic Floor and Diastasis: What You Need to Know About Pressure Management

Join us today for this 6-part Pelvic Floor and Diastasis Video Series, absolutely free.
This course is designed for health/wellness professionals, but we encourage anyone interested in learning more about the pelvic floor and diastasis to sign up.
We don't spam or give your information to any third parties. View our Terms of Use and Privacy Policy.
Prone glute lifts to help make sure you don’t fall into a tipped forward pelvis while walking that would put your lower abs on stretch.
And for some next level hamstring and glute work to further improve pelvis position as well as work on one-sided stability, you can try hamstring lifts.
So if you’re struggling with your progress after doing some isolated work on your lower abs and c-section incision, don’t forget to look at glute lengthening, hamstring engagement, or adductor engagement for some untapped potential to set up your lower abs for better function.
What to do About Bloated Abs
One last thing to assess when we talk about improving ab function is to look at what’s going on internally, particularly if you feel like you’re having a lot of abdominal bloating. A high level of inflammation in your system is a sign that your body is in a sympathetic, flight-or-fight state that is not prioritized on healing. Abdominal bloating from inflammation can also affect how well we can engage our abs and the tension put on your abdominal wall throughout the day.
You can approach this from several angles. Check to see if you’re getting an adequate water intake as well as exploring nutrition, possibly trying a low inflammation diet to help with inflammation as well as providing building blocks to compliment your strength training program. Use breathing and pelvis repositioning drills to tap into your parasympathetic (rest, relax, and digest) system. This can also indirectly help release your psoas which can contribute to abdominal distention. Meditation and a self-care routine can further help you get out of a sympathetic state. Finally, make sure you get enough sleep to help restore your healing system.
Early postpartum times are particularly stressful. Let’s face it -- life with kids can often lead to neglecting a lot of these areas, so if you feel like you’re really struggling with your progress, take a step back and see what areas you can tap into a bit more to help in your healing journey, while at the same time not further stressing you out.
Pregnancy, birthing, and postpartum experiences are different for each individual and for each pregnancy. Remember to listen to your body! Meet it where it’s at, while still choosing to show up. Assess not only what you’re doing, but how you’re doing it. All of these are important parts of your recovery. Then, don’t forget to free yourself of set expectations. It is said that comparison is the death of happiness, whether that’s comparison of yourself to another person or comparison of your current self to a past self or future self you envision. It doesn’t allow you to live in the moment and see what truly is happening right in front of you. Recovering is not about one thing, or the magic exercise. It takes some reflection, focus, and rewiring; and there is no change without challenge, which can sometimes mean a mental challenge. It doesn’t have to be perfect -- but the more you know and the better your intentions, the more you will get out of what you do to reach your goals.