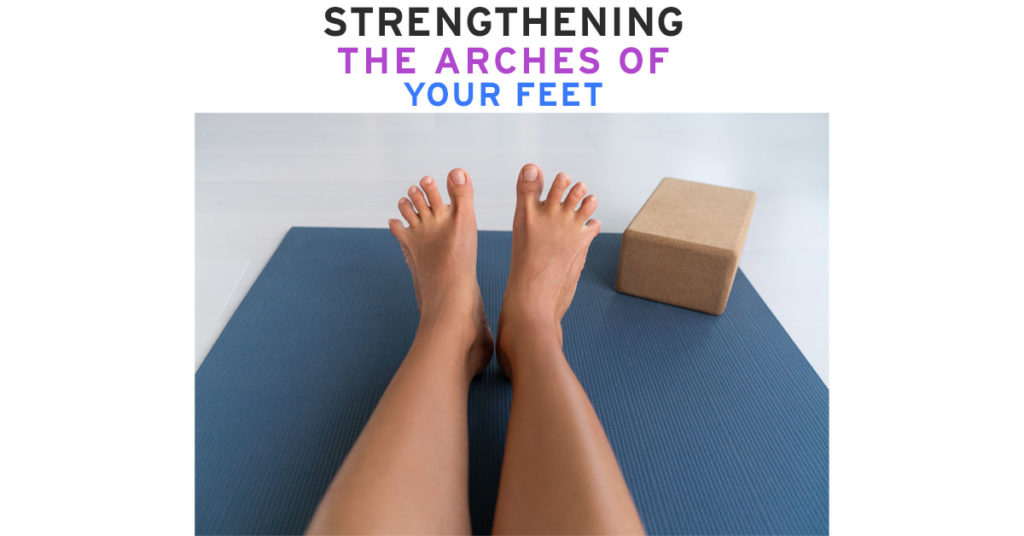
If you have pain in your feet, heels, or Achilles tendon – fallen arches, locked arches, or are looking to transition to a more minimalist shoe wear – or even have hip, core and pelvic floor problems that feel stuck in progress – here is a guide for you to explore your arch function and strength for a happier body. Old school physical therapy exercises for arches typically include toe scrunching exercises such as towel scrunches and picking up marbles, and then balancing on one foot on varied surfaces. However, there can be more productive things to try!
Understanding how the foot moves, being able to take it through active full range of motion, and then owning that movement is a key part of arch strengthening that will help create a great foundation from the ground up.
Foot Mechanics
Just like any joint in our body, for optimal muscle function you need full range of motion in all directions and under good control. The foot can be quite a complex joint, so let’s keep it simple and look at supination and pronation. Both of these movements get demonized, and people who demonstrate either are often put in a motion-controlled shoe to limit the action. However, we need both supination and pronation in our feet for full function. The question, as always, is about how and when it happens.
In the gait cycle, the foot is in supination at initial contact (when your foot is first hitting the ground) and lift-off (when your foot is about to leave the ground). Upon initial contact, the arch is in a supinated position (lifted and rigid state) to take on the initial shock and ensure a stable position. This creates a place to pronate from (eccentrically lengthening and splaying through the mid foot) to distribute the impact of hitting the ground and accommodate for uneven surfaces as you stride over your foot. Then the foot returns back to a controlled lifted up and supinated state to create a rigid foundation for you to push off from when leaving the ground. Problems can occur when you don’t start off with a good initial contact point, when you’re unable to have the action happen through the midfoot (but instead strike the ground and either collapse in without control or simply teeter to the find the big toe and push off without creating length through the midfoot) or when you’re unable to create a rigid foot to help propel you forward. If the ankle is limited in its ability to dorsiflex or stride over your foot through controlled lengthening of your calf muscle, your body will go with the path of least resistance and move through the arch instead, either collapsing it or spinning the foot out. All can contribute to arch dysfunction by either being overly lengthened and unable to lift and contract or overly shortened and unable to lengthen under control, creating increased force through joints throughout our body and affecting function up the chain.
You can also have movement patterns in the hips (poor strength or ability to stabilize the pelvis) that can cause changes in movement at the foot as a result of the trickle-down effect from the pelvis or compensation for the pelvic positioning. It becomes a bit of “the chicken and the egg” where the pelvis affects the foot, and the foot affects the pelvis. It’s all about the big picture and addressing the entire kinetic chain, looking at not only the foot but also pelvic movement and function. This can often be the case in chronic conditions such as plantar fasciitis, Achilles tendonitis, posterior tibialis tendonitis, etc, as well as hip and pelvic floor complaints. All may benefit from some attention at the foot to help set the pelvis up for success. Then there’s the knee getting stuck in the middle, because above and below aren’t doing their part. For now, let’s just focus on the foot.
Arch Mobility
Whether you have high arches or low arches, it’s about how they function and making sure they can go in both directions. No matter what your initial foot position is, both directions are good to explore for optimal foot function. These first two exercises from Gary Ward do a great job of helping feel for and clean up compensations that might occur in our feet but we might miss in bigger movements. They take your midfoot through full pronation and supination, while also working on ankle dorsiflexion range of motion to help your foot and ankle be at a more centered place to strengthen from and work the passive range before adding in the active strengthening range. After doing these exercises your feet should feel more grounded and spread, but also more free to engage and lift. You might even notice a higher arch in your feet or improved ability to lift your big toe.
Waking Up Arches
This first exercise will work on the ability for your midfoot to pronate under control as well as work on ankle dorsiflexion range and controlled lengthening of your calf. You can think of it as a “collapsing arch” exercise, but with good timing and sequencing for it to happen.
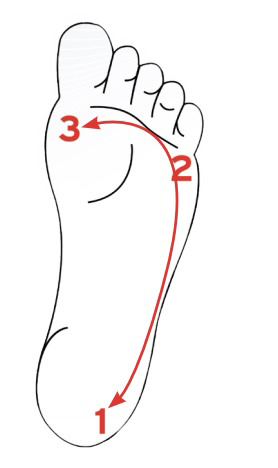
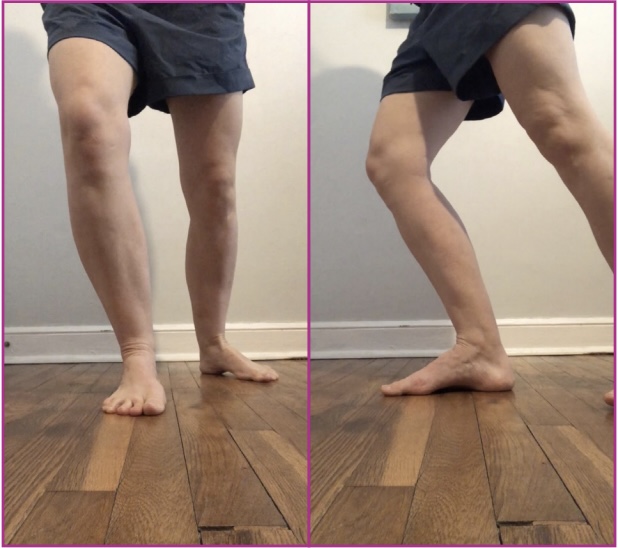
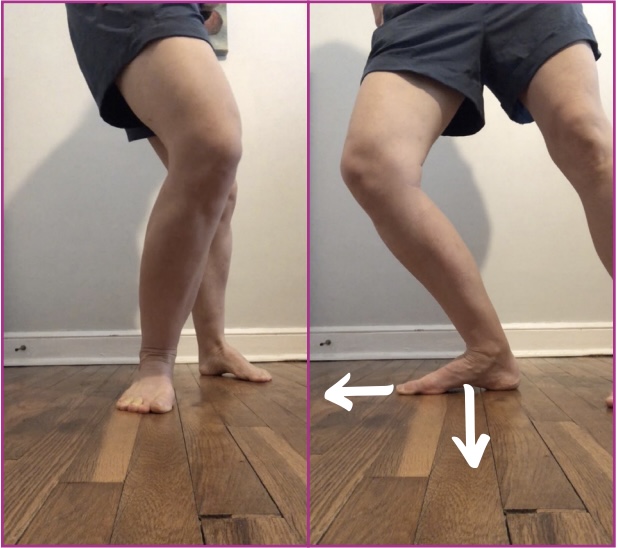
When you’re working on retraining your arch function, it’s important to help make sure you’re not cheating from somewhere else to isolate the arch. That’s why when working on this, it’s important to maintain contact at the base of your big toe, base of your pinky toe, and your heel during the entire movement. Taking some slow, focused time to increase awareness and connection of what’s happening in your feet and getting them moving like they should will help both your feet and also your pelvis. The important thing is going slowly through the movement and feeling the beginning, middle, and end in each direction so you can feel for when you lose contact at one of the 3 points, your foot wants to swivel, you lose the rib cage stack over pelvis, or your knee wants to move separately from the pelvis (often the cause of knee discomfort during the movement). Set yourself up for success by exploring placement of towel wedges to help make the movement the easiest for you. Work through your available range, but gently push that edge to feel some great unlocking and awakening of your arches to help change happen. It’s all about convincing, and not forcing.
In general, if you find you have more of a tendency to live on the outside of your foot, have feet that turn out, or have high arches, then it may help to use a wedge under the outside of your heel, focus on keeping your pinky toe heavy while you find that big toe, and feel the spreading and lengthening of your toes as your let the arch collapse. If you are the opposite with more a collapsed arch, living on the inside of your heel and foot, or your foot turns in, you’ll probably start your exploration with a wedge under the inside heel and base of big toe and will probably have to focus on keeping your heel heavy as you shift forward and work the dorsiflexion range to not collapse into your arch early. People with a history of metatarsalgia or Morton’s neuroma will need all the opening and splaying to distribute weight and might need wedges in all three places, but at least at the base of the big toe and pinky toe.
Big Toe Movement for Arches
This next exercise helps more with supination, or the ability to lift up your arch. It can be great for fallen arches, using other parts of your body to help your arch remember how to lift, and help with big toe movement, which is huge for not putting extra stress through the arch and for finding your glutes in gait. Again, focus on maintaining contact between the base of your big toe, pinky toe, and heel as you lift your toes up, and think of driving the base of the big toe down to then rotate your hips and traction your leg in the other direction. Use towel wedges as needed on places that want to lift up. If you find your big toe really wants to drift in toward the others, placing a pen cap between your big toe and second toe can help retrain it to not do that. This can help address the heel position and mid foot mobility that you’re doing here, in the waking up arches drill, and with the use of wedges during lower body movements.
How to Build the Arch
Short Foot
Now we’re going to work on feeling your arch engage. You’re going to stand on both legs at first, but “connect” to one foot at a time. Actively lift your toes, spreading them, and consciously place them back down in the spread position (your hands might have to help). Maintaining this position, think of gently pulling the base of your big toe back while maintaining the pressing of your entire big toe and the base of your big toe into the ground (making sure your toe doesn’t scrunch for this movement.) You should see your arch lift and engage. Hold for 3 seconds, and work up to 10 reps. Give yourself a nice calf stretch afterwards to help everything relax.
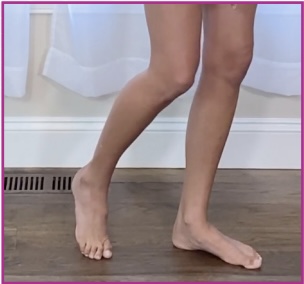
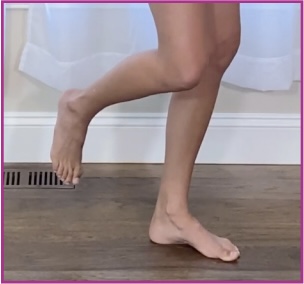
Once this feels easy, you can work on it as you balance on one leg and apply that grounding concept to your other lifts and movements (it can even help bring more energy and connection to your upper body through fascial connections of the arches to your deep core.)
Fallen Arch Exercises
Toe Yoga
If the short foot exercise is feeling pretty challenging and you’re having a hard time not scrunching your toes or even finding your arch muscles, simply working on neural connections through some toe yoga will help build this awareness by figuring out how to make your arch muscles fire when not under load as well as strengthening all of the tiny intrinsic muscles of your foot. This also helps with that big toe wanting to drift in or bunions, as well as strengthening your pinky toe which can have weakness common with those who have Tailor’s bunions and a history of 5th metatarsal injuries. It’s a great exercise to throw in when sitting giving kids a bath, as a “work break” if you can take your shoes off, or while relaxing watching a show. Giving your foot a little assist in mobility with some stretches between your toes, your toe flexors and extensors can help make the active movements that much easier. It might start off feeling like Jedi mind tricks, but just like any neural connections, it’s all about frequency and repetition. Give yourself the challenge of trying it for a few minutes every day for a few weeks, and see where it takes you.
Eccentric Calf Raises
Lastly, eccentric calf raises over a step with a focus on arch movement are great for taking your foot and ankle mechanics to the next level while also getting more ankle range of motion. This movement is great for working on controlled pronation of your midfoot, eccentric calf lengthening (which will help you get range and strength for more staying power), and how to create a solid arch to push off with using your calf, setting your hips up for success. Working on both legs at the same time will help prevent overloading the system so you can make sure it’s coming from the right places, and then progressively work toward one leg for ultimate strength. If you find you have the tendency to roll toward one side of your foot more than the other, you can again use wedges at your feet to improve the ease of contact.
If you find the movement too challenging to control from a step, remember you can practice working on maintaining the arch and equal weight through the base of the big toe and pinky toe as you go up and down in a calf raise from the ground, while still focusing on the eccentric control and lowering.
Some of these exercises can be done every day, and some you may need to space out depending on the demand and load on your body. The amount of weeks spent on each will vary depending on your awareness level and strength. That being said, after trying some of them, you’ll hopefully start to feel your arches being happily woken up for improved dynamic control and stability and feel the benefit of that increased connection from the ground up.

